Overview
[ Top
| RopeRider
| Return to Vertical Spools
]
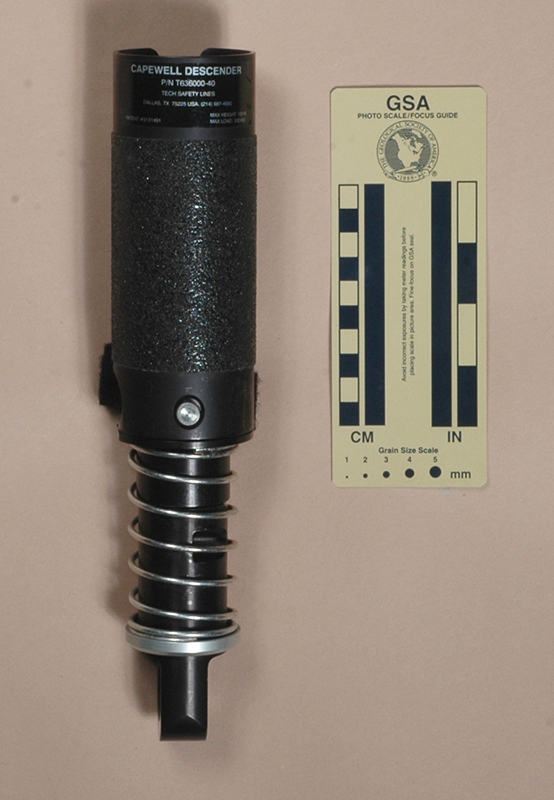
 Capewell
(#1433)
Technical Details
I acquired my Tech Safety Lines Capewell Descender from RecyclingIt Inc. in 2015.
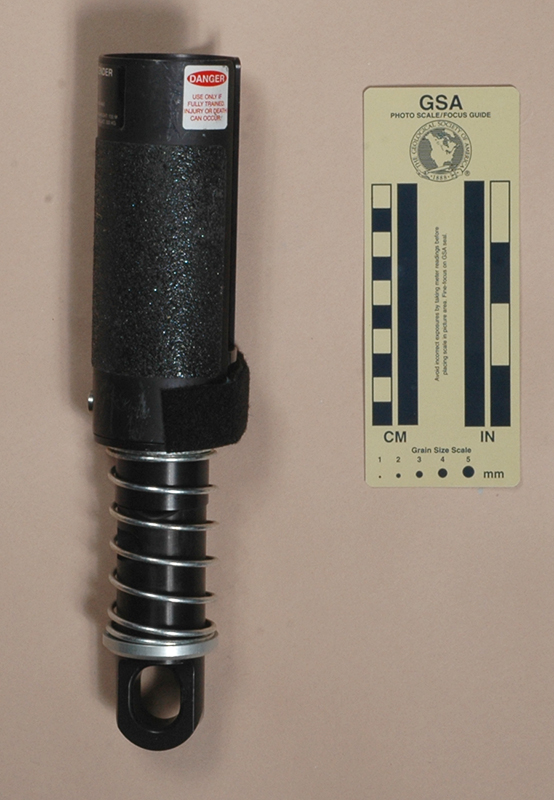
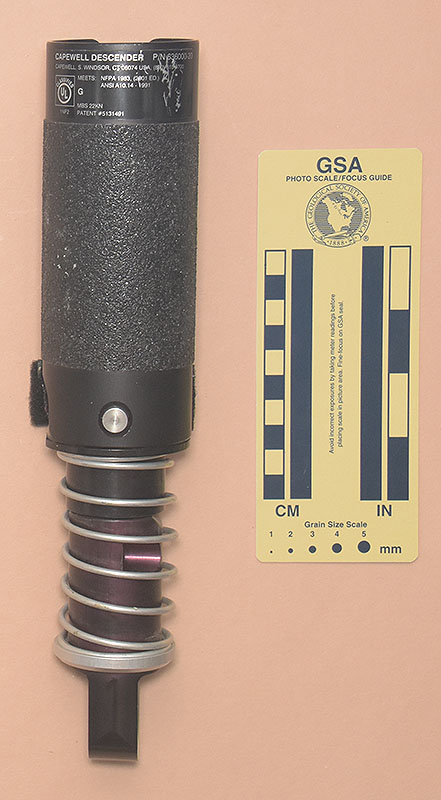
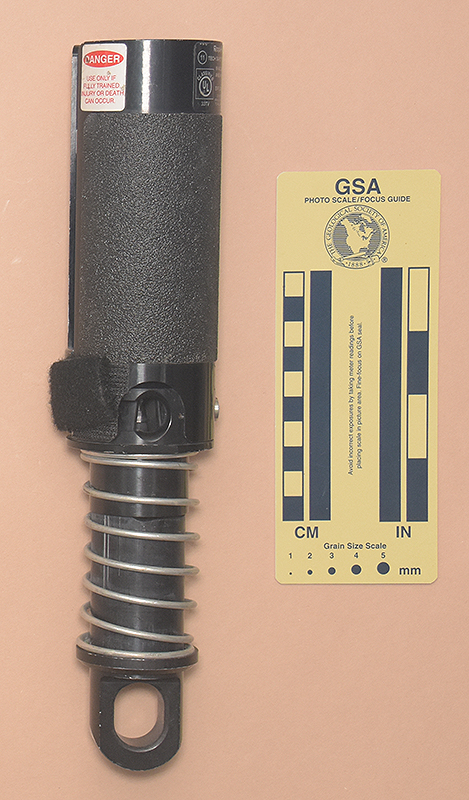
My Capewell is 283 mm. tall, 57 mm. wide, 53 mm. thick, and weighs 742 g. It consists of a central vertical shaft (reminiscent
of the Sky Genie) with a spring-loaded
V-slot stop mechanism, and a detachable cylindrical cover plate. There is a Velcro™ closure on the cylinder.
The top is engraved with "S/N 6372." There are also three stickers attached. The first has "DANGER" and "USE ONLY IF FULLY TRAINED, INJURY OR DEATH CAN OCCUR."
The second has "CAPEWELL DESCENDER," "P/N 636000-20," "CAPEWELL," "S. WINDSOR, CT 06074 USA, (860)-610-9700,"
"Patent #5131491," "MAX HEIGHT:100 M," and "MAX LOAD: 300 KG." The final sticker has "WARNING" and "APPROVED ROPE ONLY."
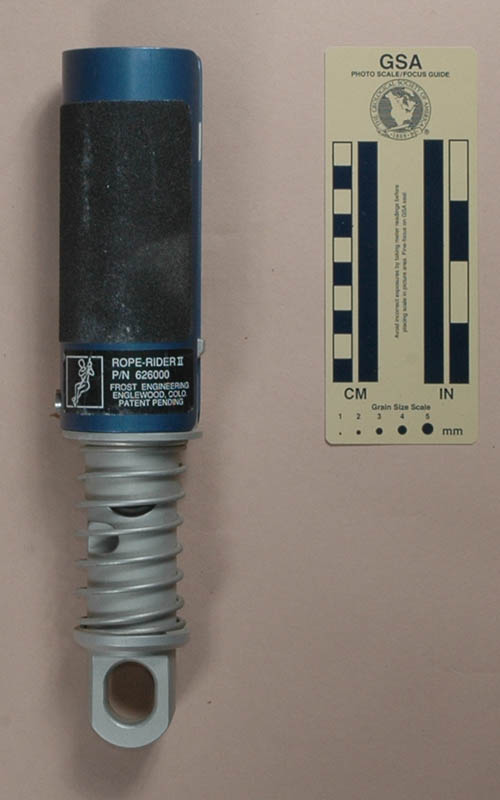
The following ascenders are variations of the same basic design, made successively by several companies under various names:
The first of these was the Frost Rope Rider II, made by Frost Engineering out of Englewood, Colorado. Next, Capewell of Windsor, CT acquired the rights and added Velcro™ to the design. I have no idea why. Finally, Tech Safety Lines of Dallas, TX acquired the rights and produced the Capewell Descender before renaming it as the RopeRider. These are protected by U.S. Patent #5,038,888.
Not
only is this a clever design, but these have
excellent workmanship as well. Although these are not the cheapest
devices around, they definitely deserve a star .
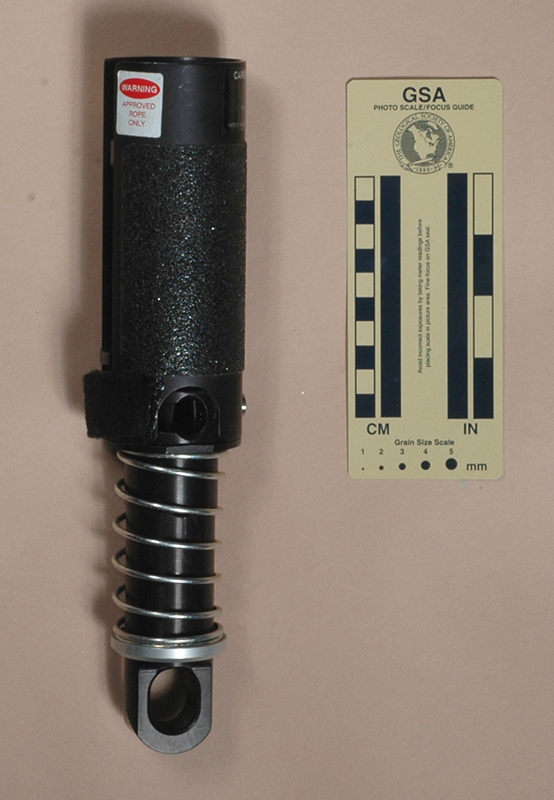
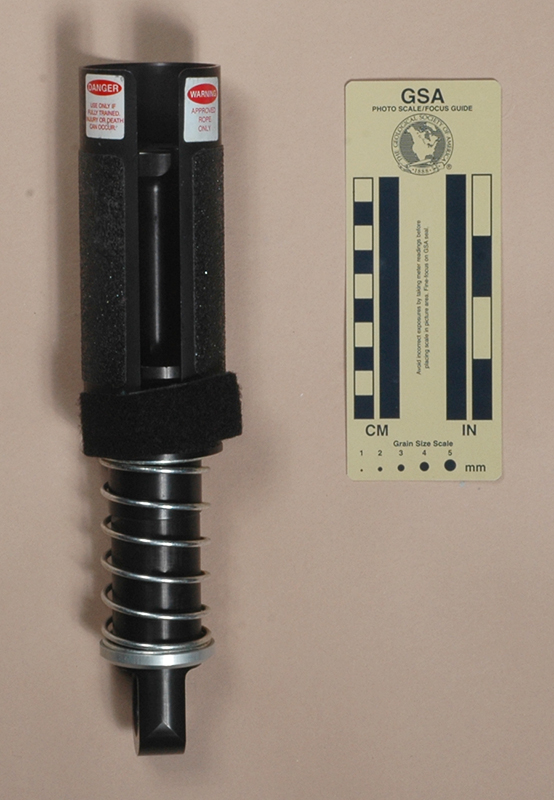
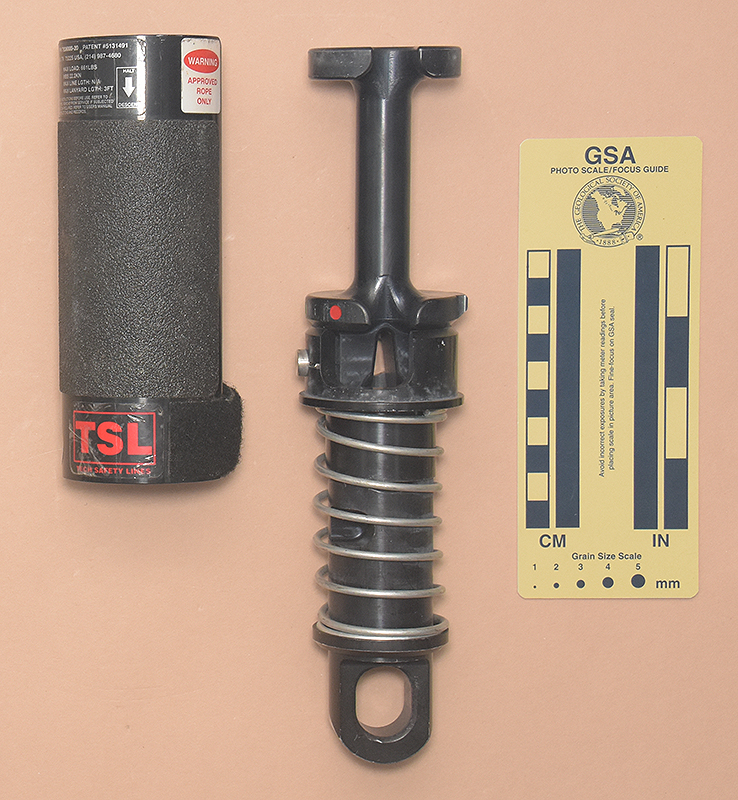
Rigging is
simple: Press the release button and slide the cover off the top.
Pull the sliding collar downward and press the button to latch
it in the open position. The V-slot is now exposed. Slide it over
the rope, then twist the collar and slide it back up, catching
the rope in the slot on the collar. Rotate the collar until it
is aligned as shown in the lower photo. Now wrap the rope the
required number of turns (usually 3 to 5, depending on the rope
material, diameter, construction, condition, and phase of the
moon) around the rod, slide the cover back on, and make sure that
the release button engages the hole in the cover.
Clip in, and get into a normal rappelling position. Prudes
should stop here and find another device to read about. Grasp
the cover with one hand, and pull it down. This slides the collar
down, and moves the rope to a wider part of the V-groove. To slow
down, move your hand up, to go faster, pull it down. The whole
process works very smoothly…except it is still a vertical spool,
and on a free drop, you will spin.
|
 |
Warning:
These
are not complete instructions!! Obtain proper training before
using this device. |
|
|
This will not replace the rappel rack as the preferred deep
pit device, nor is it light enough for serious consideration in
rock climbing, but in an industrial environment, it may provide
some more idiot protection than some other options would.
[ Top
| Capewell
| Return to Vertical Spools
]
RopeRider
(#3078)
Technical Details
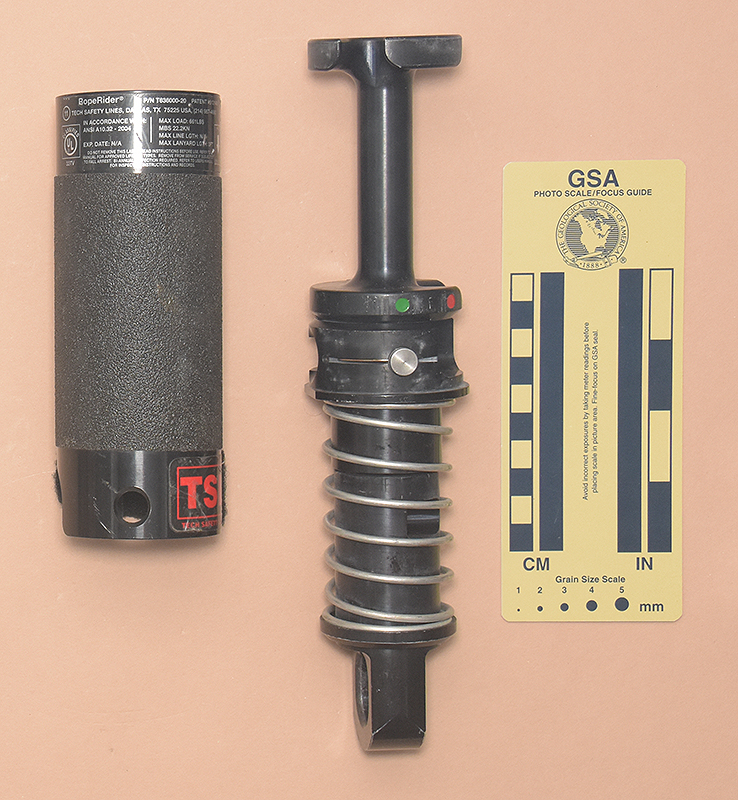
I acquired my Tech Safety Lines RopeRider from Michael Record in 2021.
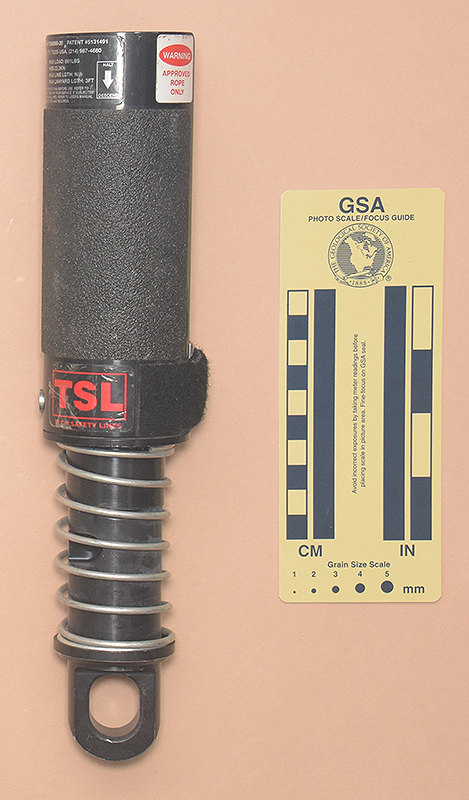
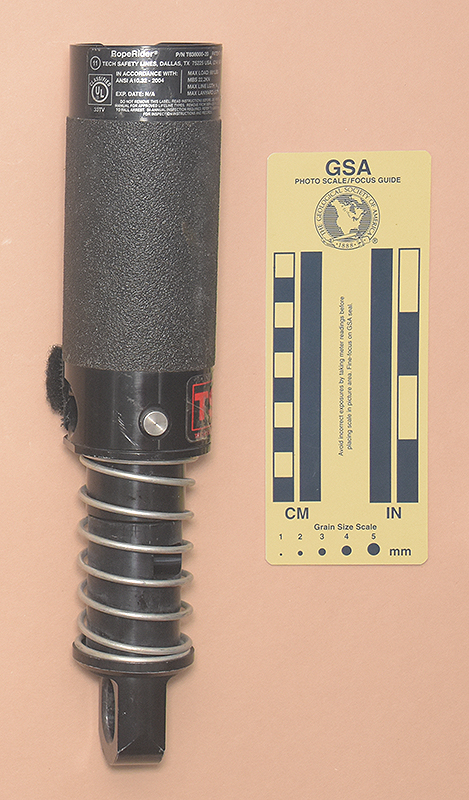
My RopeRider is 283 mm. tall, 60 mm. wide, 59 mm. thick, and weighs 732 g. It consists of a central vertical shaft (reminiscent of the Sky Genie) with a spring-loaded V-slot stop mechanism, and a detachable cylindrical cover plate. There is a Velcro™ closure on the cylinder.
The top is engraved with "S/N3386,"09/13," "USE APPVD 1/2" - 3/8" ROPE ONLY," and "USE APPVD 11-13 mm ROPE ONLY."
There are also four stickers attached. The first has "DANGER" inside a filled ellipse, "USE ONLY IF FULLY TRAINED," and "INJURY OR DEATH CAN OCCUR. The second has "RopeRider®," "P/N T636000-20," "PATENT #5131491," "11" inside a circle, "TECH SAFETY LINES," "DALLAS, TX 75255 USA, (214)-987-4680," the UL Classified logo with "33TV" underneath, "IN ACCORDANCE WITH: ANSI A10.32 - 2004," EXP. DATE: N/A," a vertical line, "MAX LOAD: 661LBS," "MBS22.2KN," "MAX LINE LGTH: NA," MAX LANYARD LFTH: 3FT," "DO NOT RAMOVE THIS LABEL. READ INSTRUCTIONS BEFORE USE. REFER TO MNUAL FOR APPROVED LIFELINE TYPES. REMOVE ROM SERVICE IF SUBJECTED TO FALL ARREST. BI-ANNUAL INSPETION REQUIRED. REFER TO USERS MANUAL FOR INSPECTIOIN INSTRUTIONS AND RECORDS.", and a rectangle containing a"HALT," a down-pointing arrow, and "DESCEND." The third sticker has "WARNING" inside a filled ellipse and "APPROVED ROPE ONLY." The final sticker has "TSL" inside a rectangle with "TECH SAFETY LINES" below.
The following ascenders are variations of the same basic design, made successively by several companies under various names:
The first of these was the Frost Rope Rider II, made by Frost Engineering out of Englewood, Colorado. Next, Capewell of Windsor, CT acquired the rights and added Velcro™ to the design. I have no idea why. Finally, Tech Safety Lines of Dallas, TX acquired the rights and produced the Capewell Descender before renaming it as the RopeRider. These are protected by U.S. Patent #5,038,888.
Not
only is this a clever design, but these have
excellent workmanship as well. Although these are not the cheapest
devices around, they definitely deserve a star .
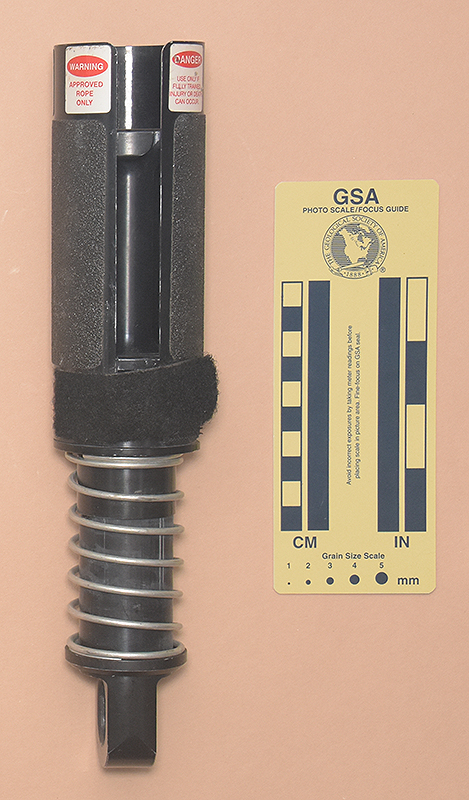
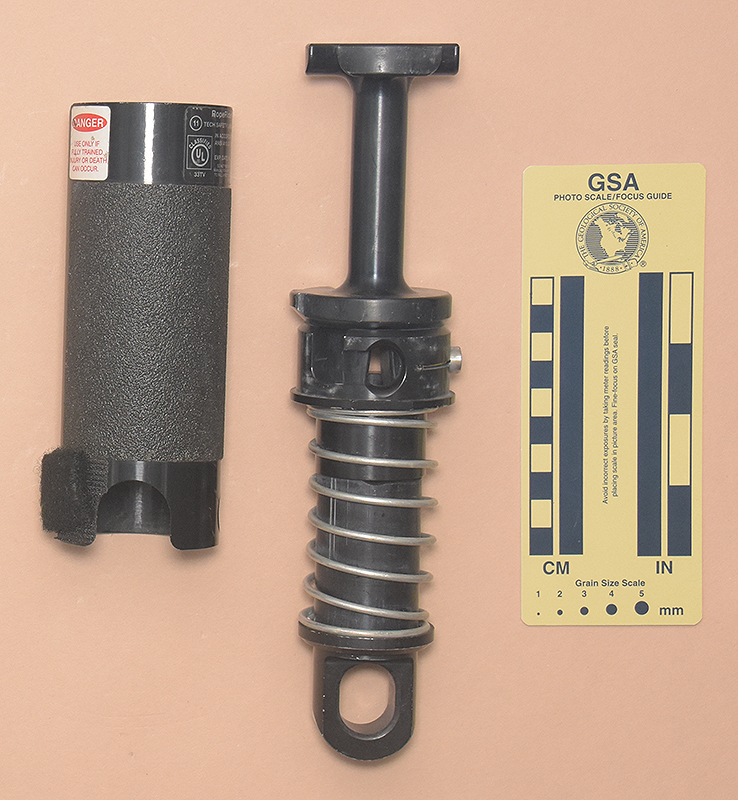
Rigging is
simple: Press the release button and slide the cover off the top.
Pull the sliding collar downward and press the button to latch
it in the open position. The V-slot is now exposed. Slide it over
the rope, then twist the collar and slide it back up, catching
the rope in the slot on the collar. Rotate the collar until it
is aligned as shown in the lower photo. Now wrap the rope the
required number of turns (usually 3 to 5, depending on the rope
material, diameter, construction, condition, and phase of the
moon) around the rod, slide the cover back on, and make sure that
the release button engages the hole in the cover.
Clip in, and get into a normal rappelling position. Prudes
should stop here and find another device to read about. Grasp
the cover with one hand, and pull it down. This slides the collar
down, and moves the rope to a wider part of the V-groove. To slow
down, move your hand up, to go faster, pull it down. The whole
process works very smoothly…except it is still a vertical spool,
and on a free drop, you will spin.
|
|
Warning:
These
are not complete instructions!! Obtain proper training before
using this device. |
|
|
This will not replace the rappel rack as the preferred deep
pit device, nor is it light enough for serious consideration in
rock climbing, but in an industrial environment, it may provide
some more idiot protection than some other options would.

[ Top
| Capewell
| RopeRider
]