Overview
[ Top
| Rope Rider II
| Return to Vertical Spools
]
 Frost
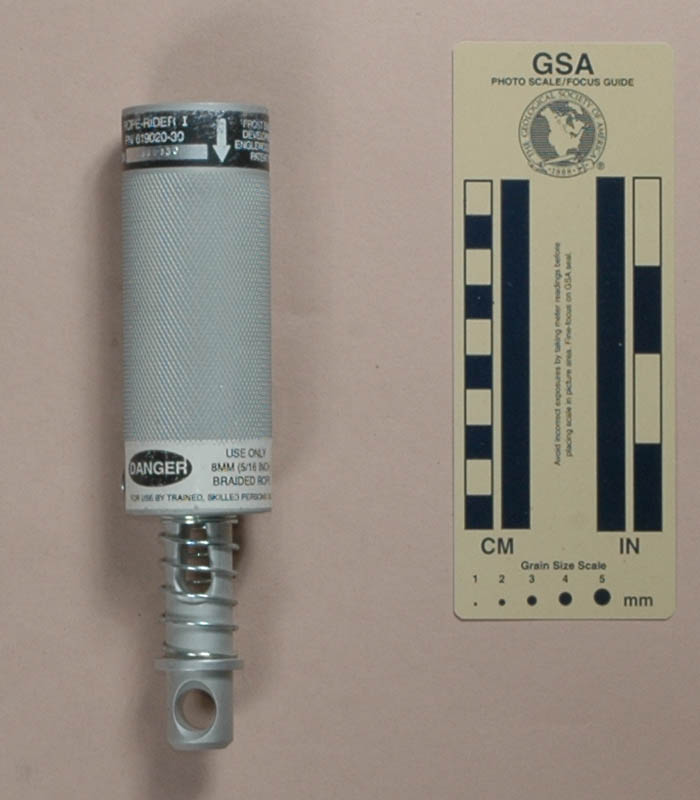
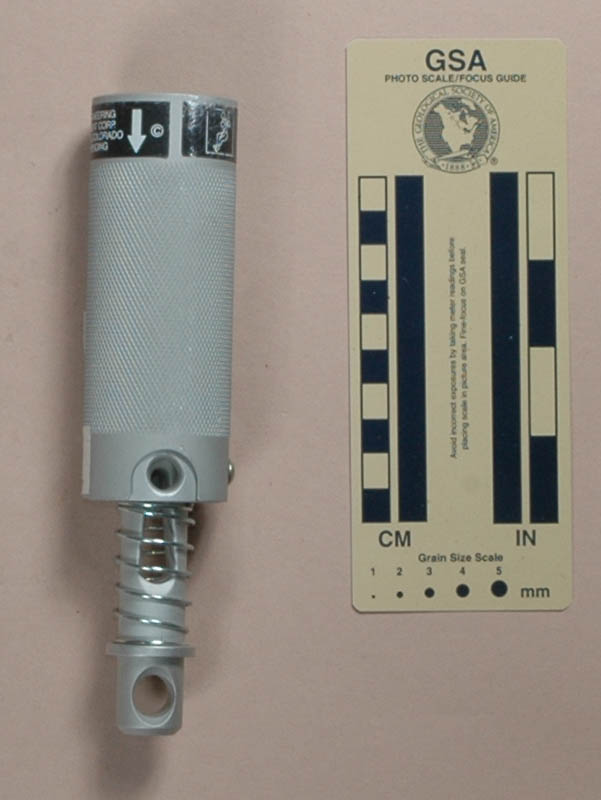
Rope Rider I
Frost
Rope Rider I
(#558)
Technical Details
I acquired my Frost Rope Rider I from International Safety Equipment in 1999.
My Frost Rope Rider I is 178 mm. tall, 43 mm. wide, 42 mm. thick, and weighs 258 g.
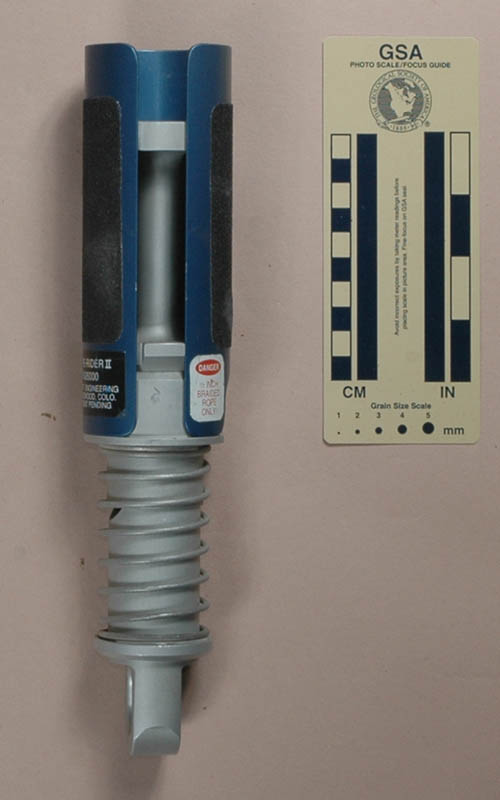
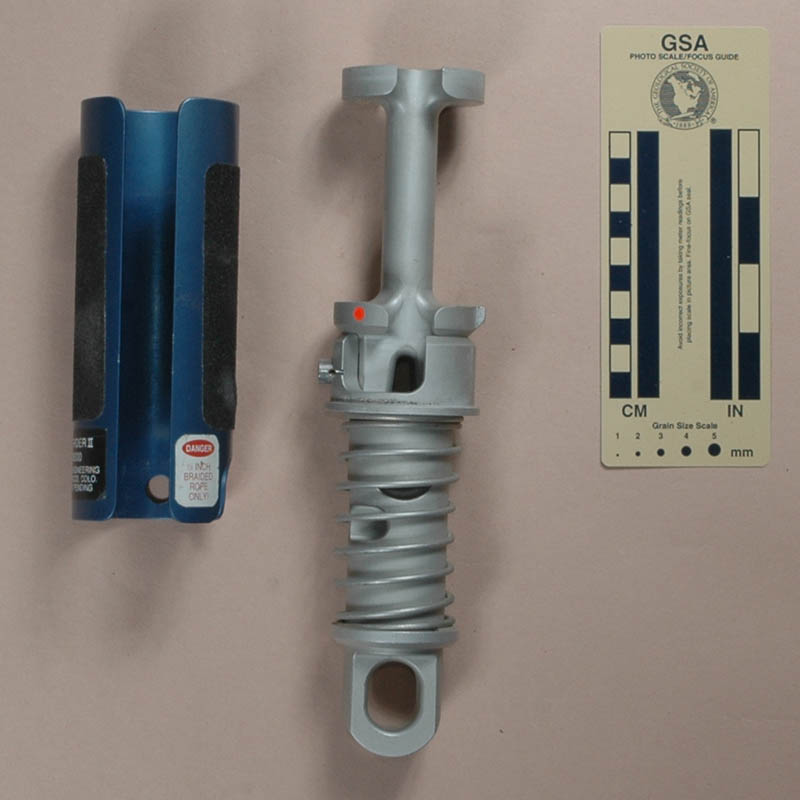
The Rope Rider I consists of a central vertical shaft (reminiscent
of the Sky Genie) with a spring-loaded
V-slot stop mechanism, and a removable cover plate. The mechanism
is similar to the one on the Rope Rider II, but with some key differences. Unlike the Rope Rider II, the Rope Rider I cover is held in place by a hex cap screw.
The cover is tubular, with no slot in the side, so one cannot
rig the Rope Rider 1 without threading the end of the rope through
the cover. Another difference is that the lower rope guide is
a hole instead of a slot, so the end of the rope must be threaded
through this as well. Finally, the guides notches on the on the
Rope Rider I force you to use an integer+a half number of turns,
taking away the option of varying friction in half-turn increments
as can be done with the Rope Rider II. (Note the difference between the rear of the spool
at left and the front above).
Like its larger brother, this a clever design implemented with excellent
workmanship. In this case, though, bigger really is better.
The Rope Rider I is designed to be used on 8 mm. (5/16 in.)
braided rope only. This indicates that it is an emergency escape
device rather than a general purpose rappelling device. It certainly
is not worth serious consideration for routine industrial use,
caving, rock climbing, or "sport rappelling," whatever
that is. If it is used for emergency evacuation only, one must
be sure to prepare it in advance. Anyone who doesn't and finds
themselves in a blazing third-floor apartment better just jump,
because by the time they find the proper size Allen wrench, take
the screw out, thread the end of the rope through the proper holes
in the proper order, find the screw and replace it, its too late:
they’re already lemon barbecue.
The Rope Rider I is protected by U.S. Patent #5,131,491.
[ Top
| Rope Rider I
| Return to Vertical Spools
]
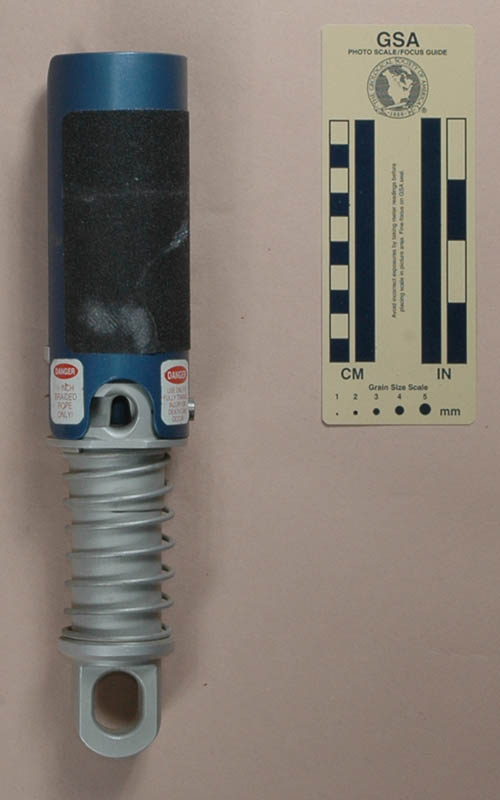
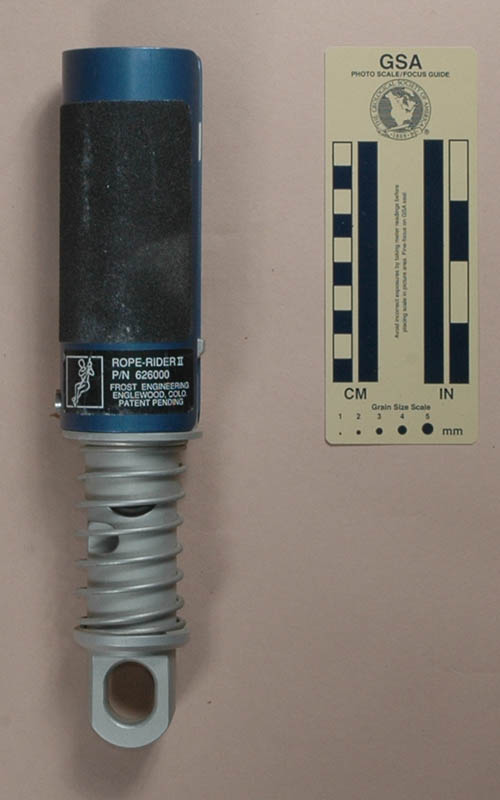
 Frost Rope Rider II
(#429)
Technical Details
I acquired my Frost Rope Rider II from John E. Weinel, Inc. in 1991.
My Frost Rope Rider II is 248 mm. tall, 59 mm. wide, 57 mm. thick, and weighs 743 g.
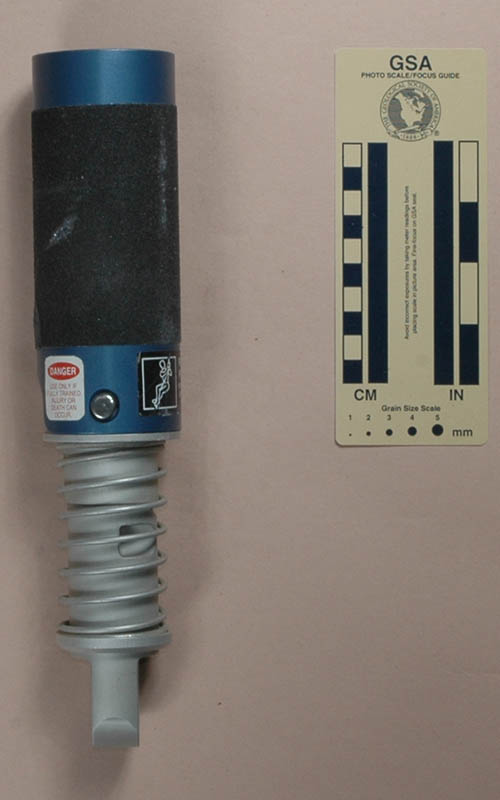
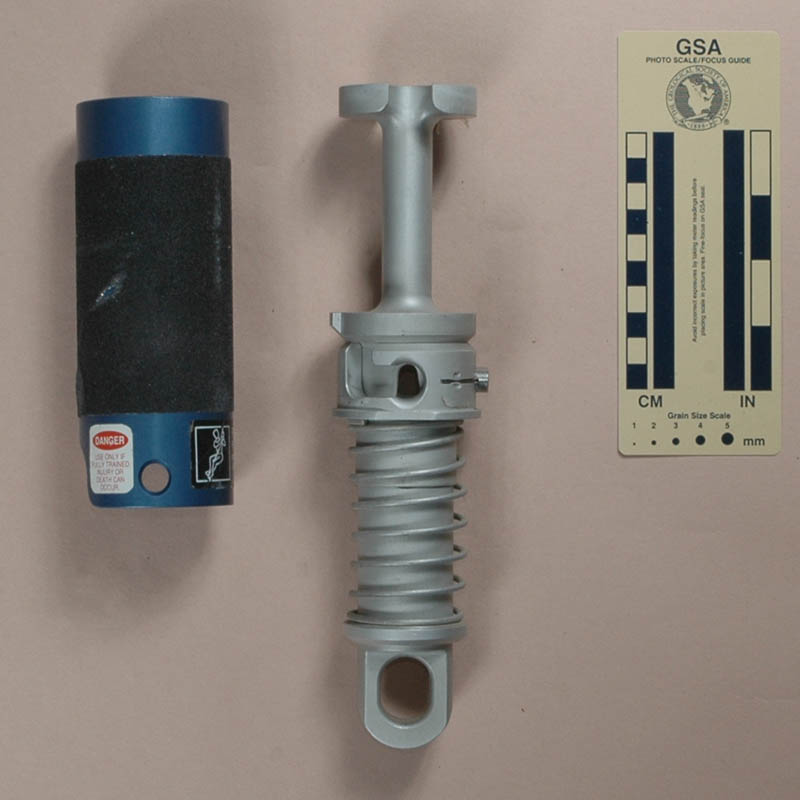
The Rope Rider II consists of a central vertical shaft (reminiscent
of the Sky Genie) with a spring-loaded
V-slot stop mechanism, and a detachable cover plate.
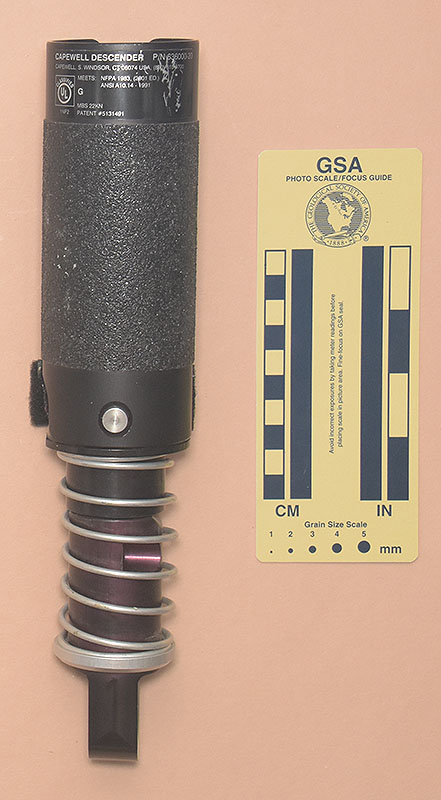
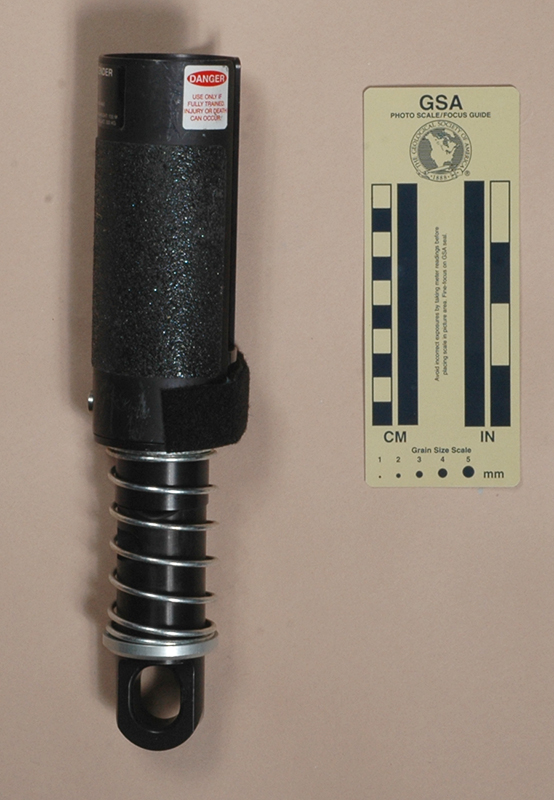
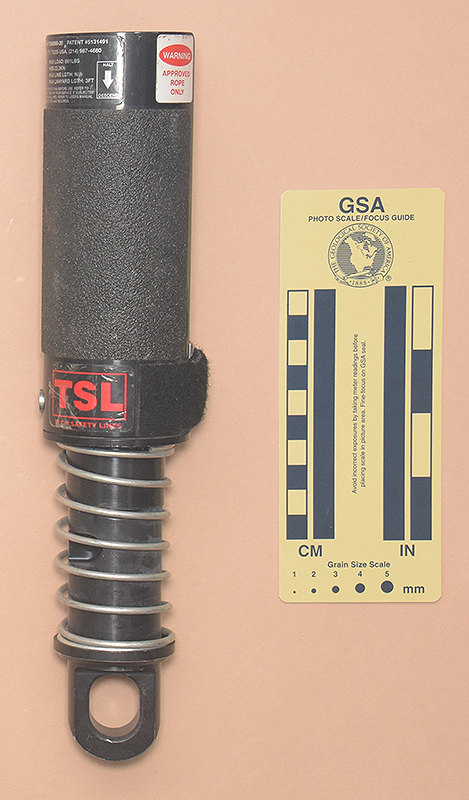
The following ascenders are variations of the same basic design, made successively by several companies under various names:
The first of these was the Frost Rope Rider II, made by Frost Engineering out of Englewood, Colorado. Next, Capewell of Windsor, CT acquired the rights and added Velcro™ to the design. I have no idea why. Finally, Tech Safety Lines of Dallas, TX acquired the rights and produced the Capewell Descender before renaming it as the RopeRider. These are protected by U.S. Patent #5,038,888.
Not
only is this a clever design, but these have
excellent workmanship as well. Although these are not the cheapest
devices around, they definitely deserve a star .
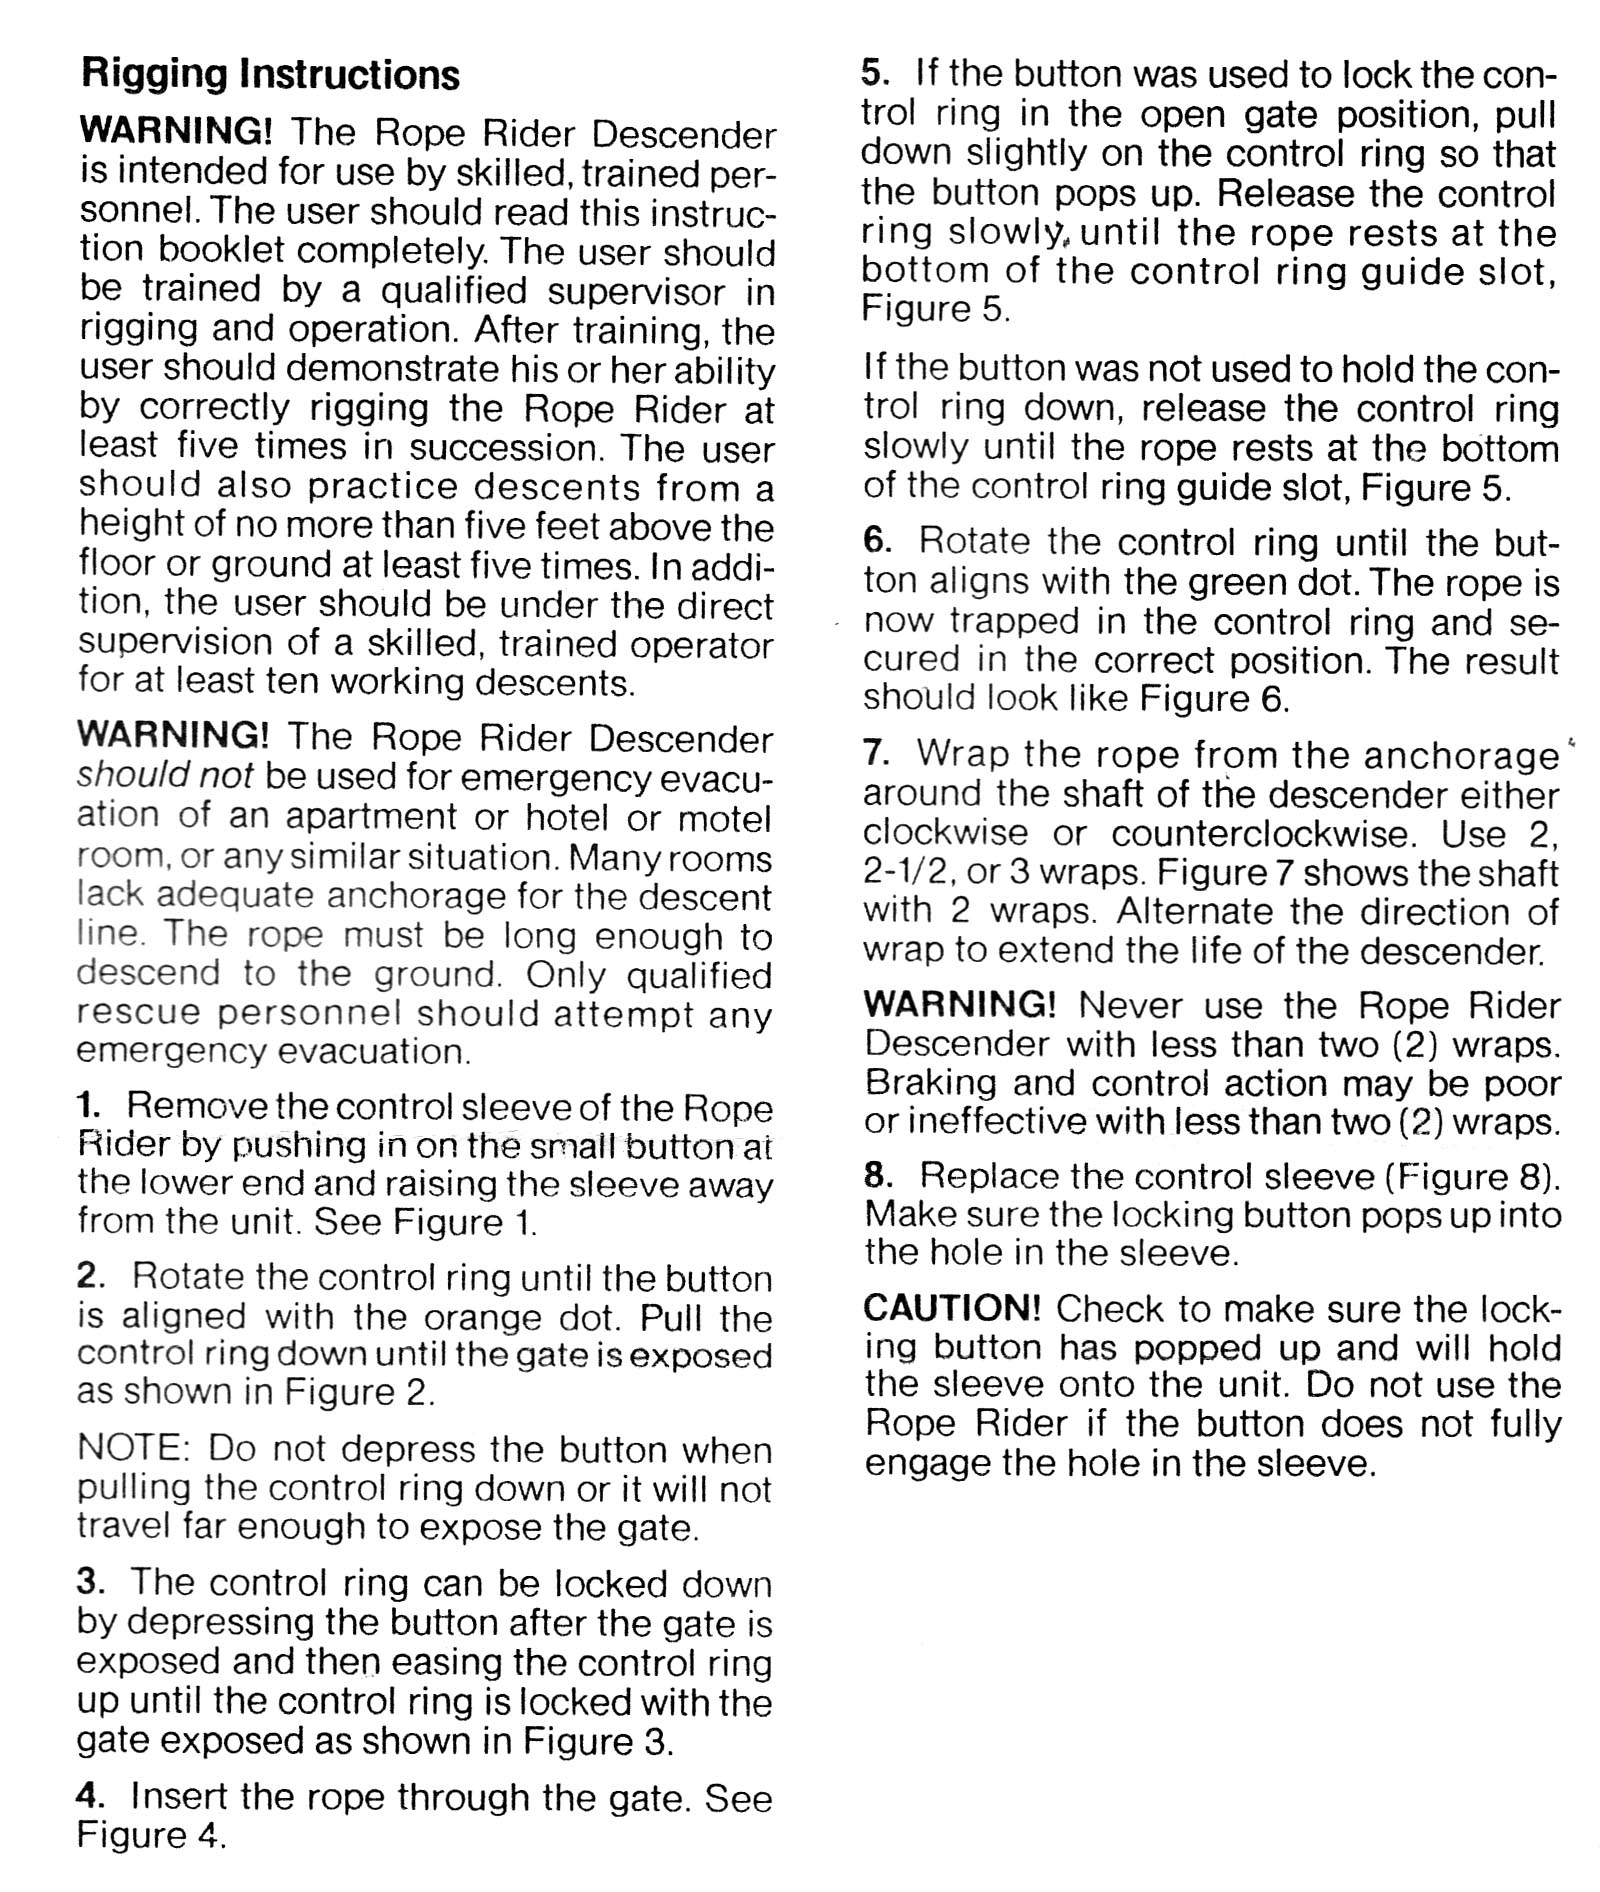
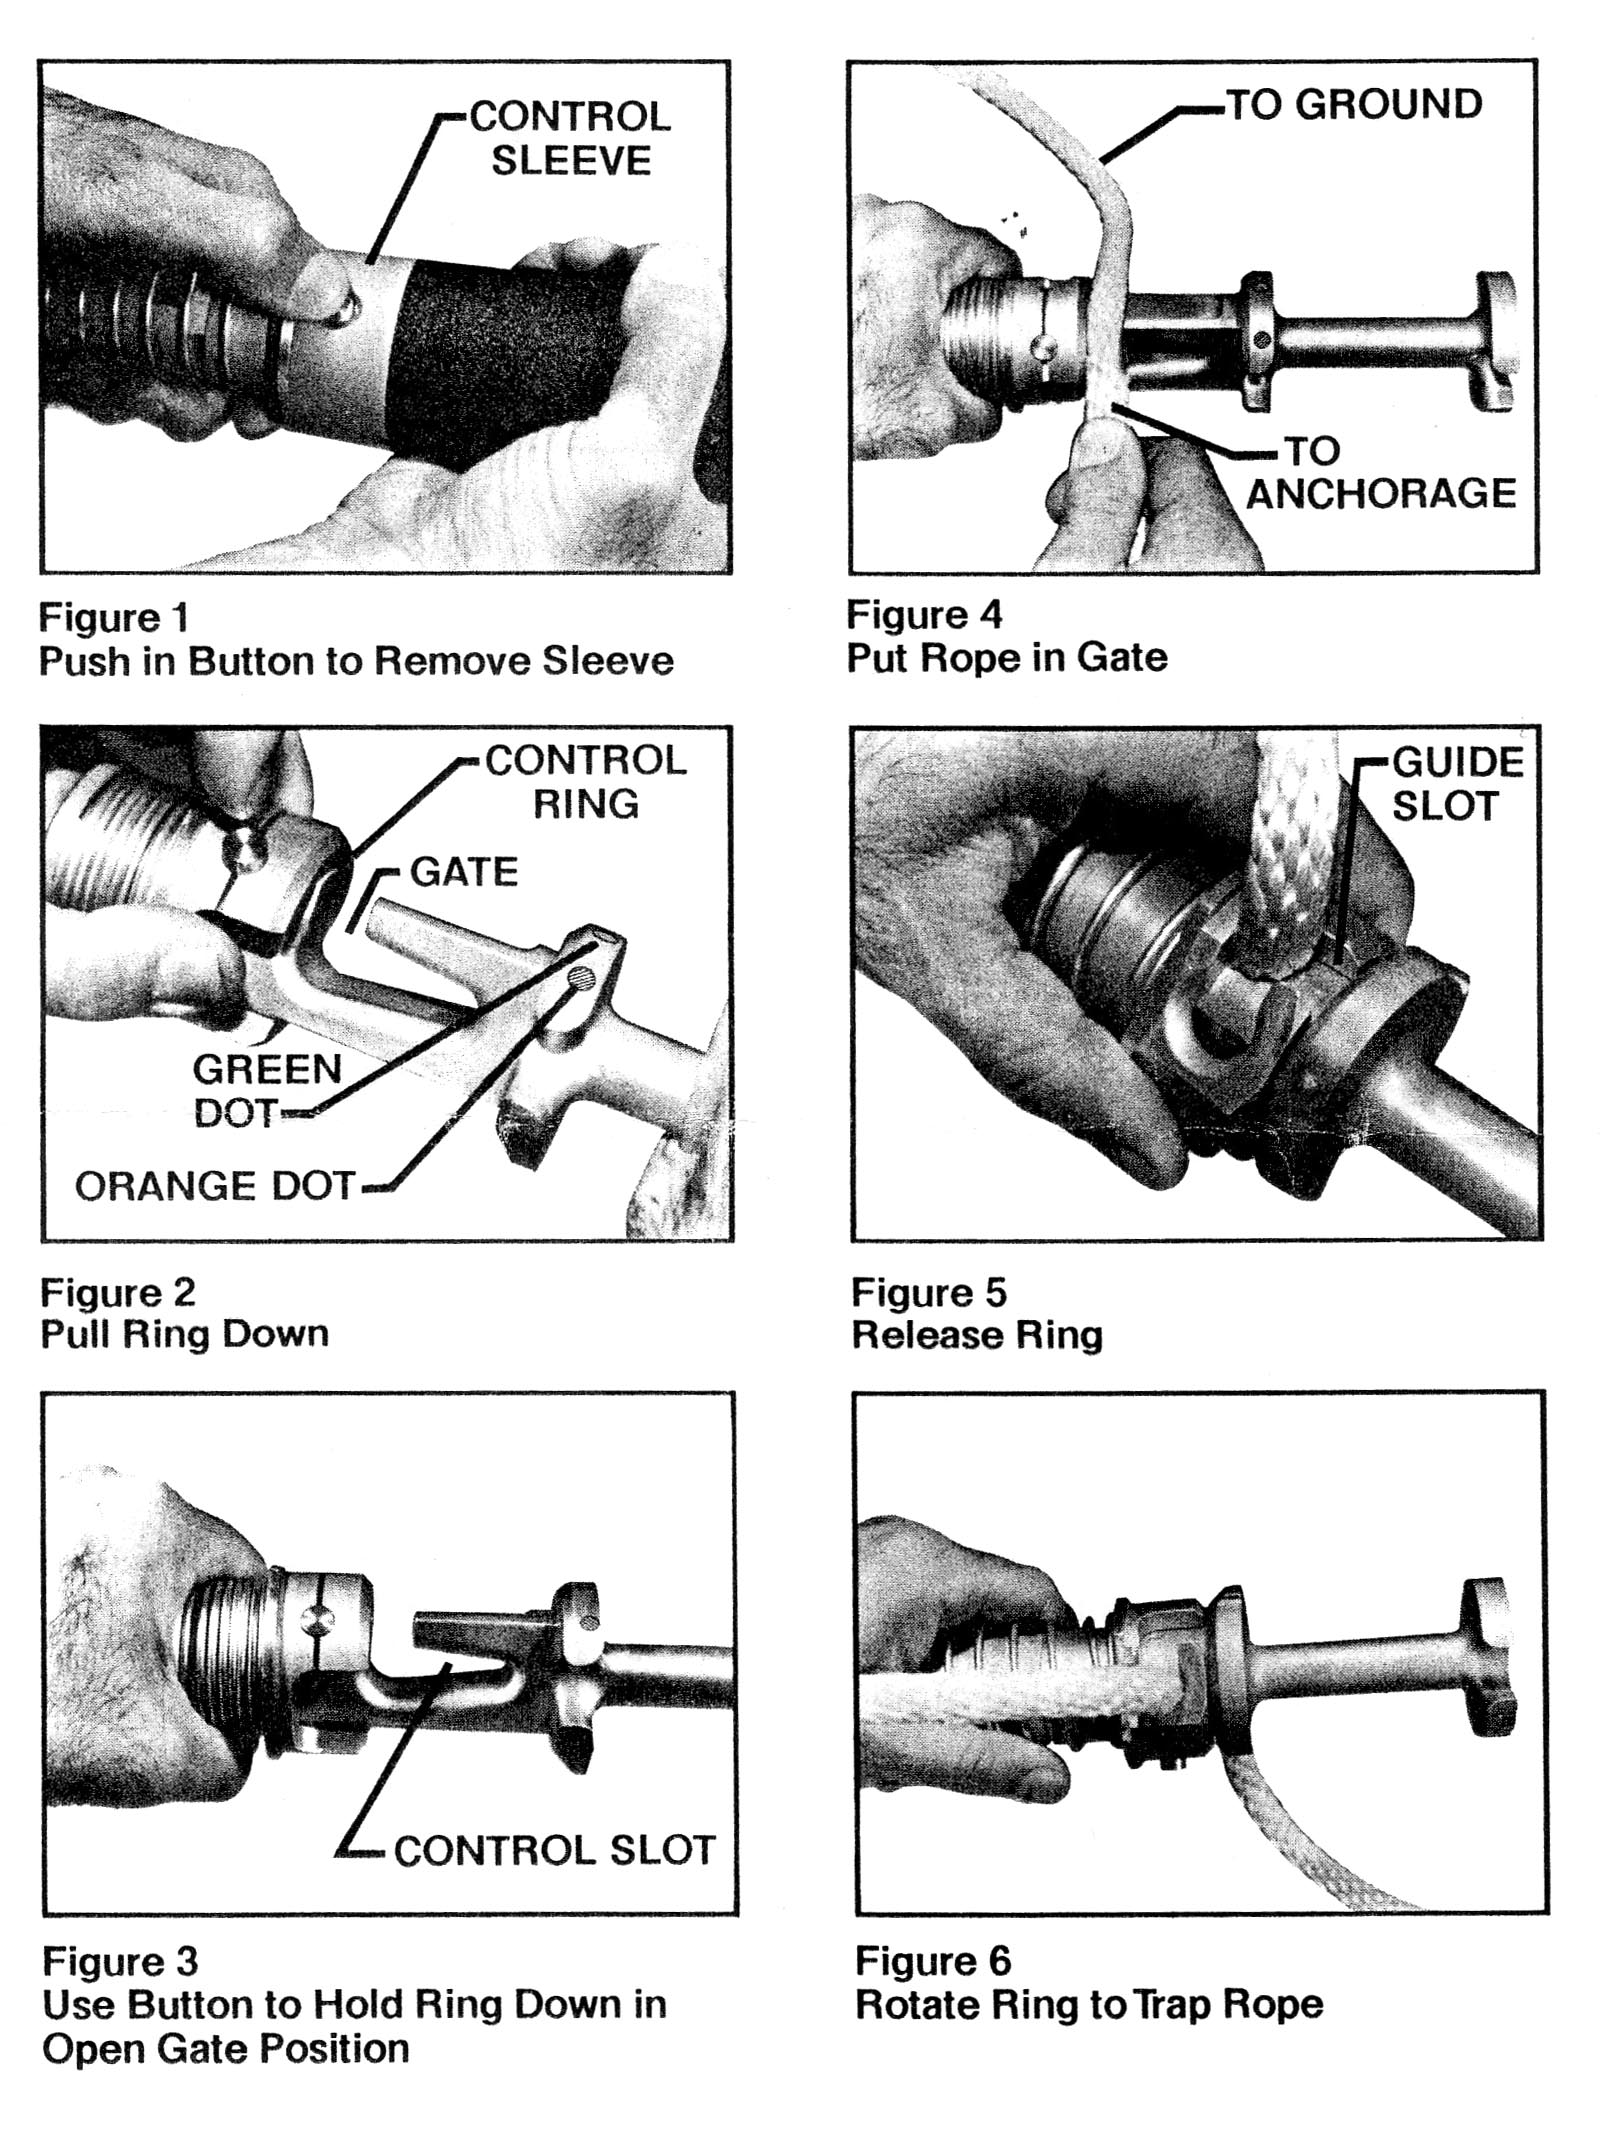
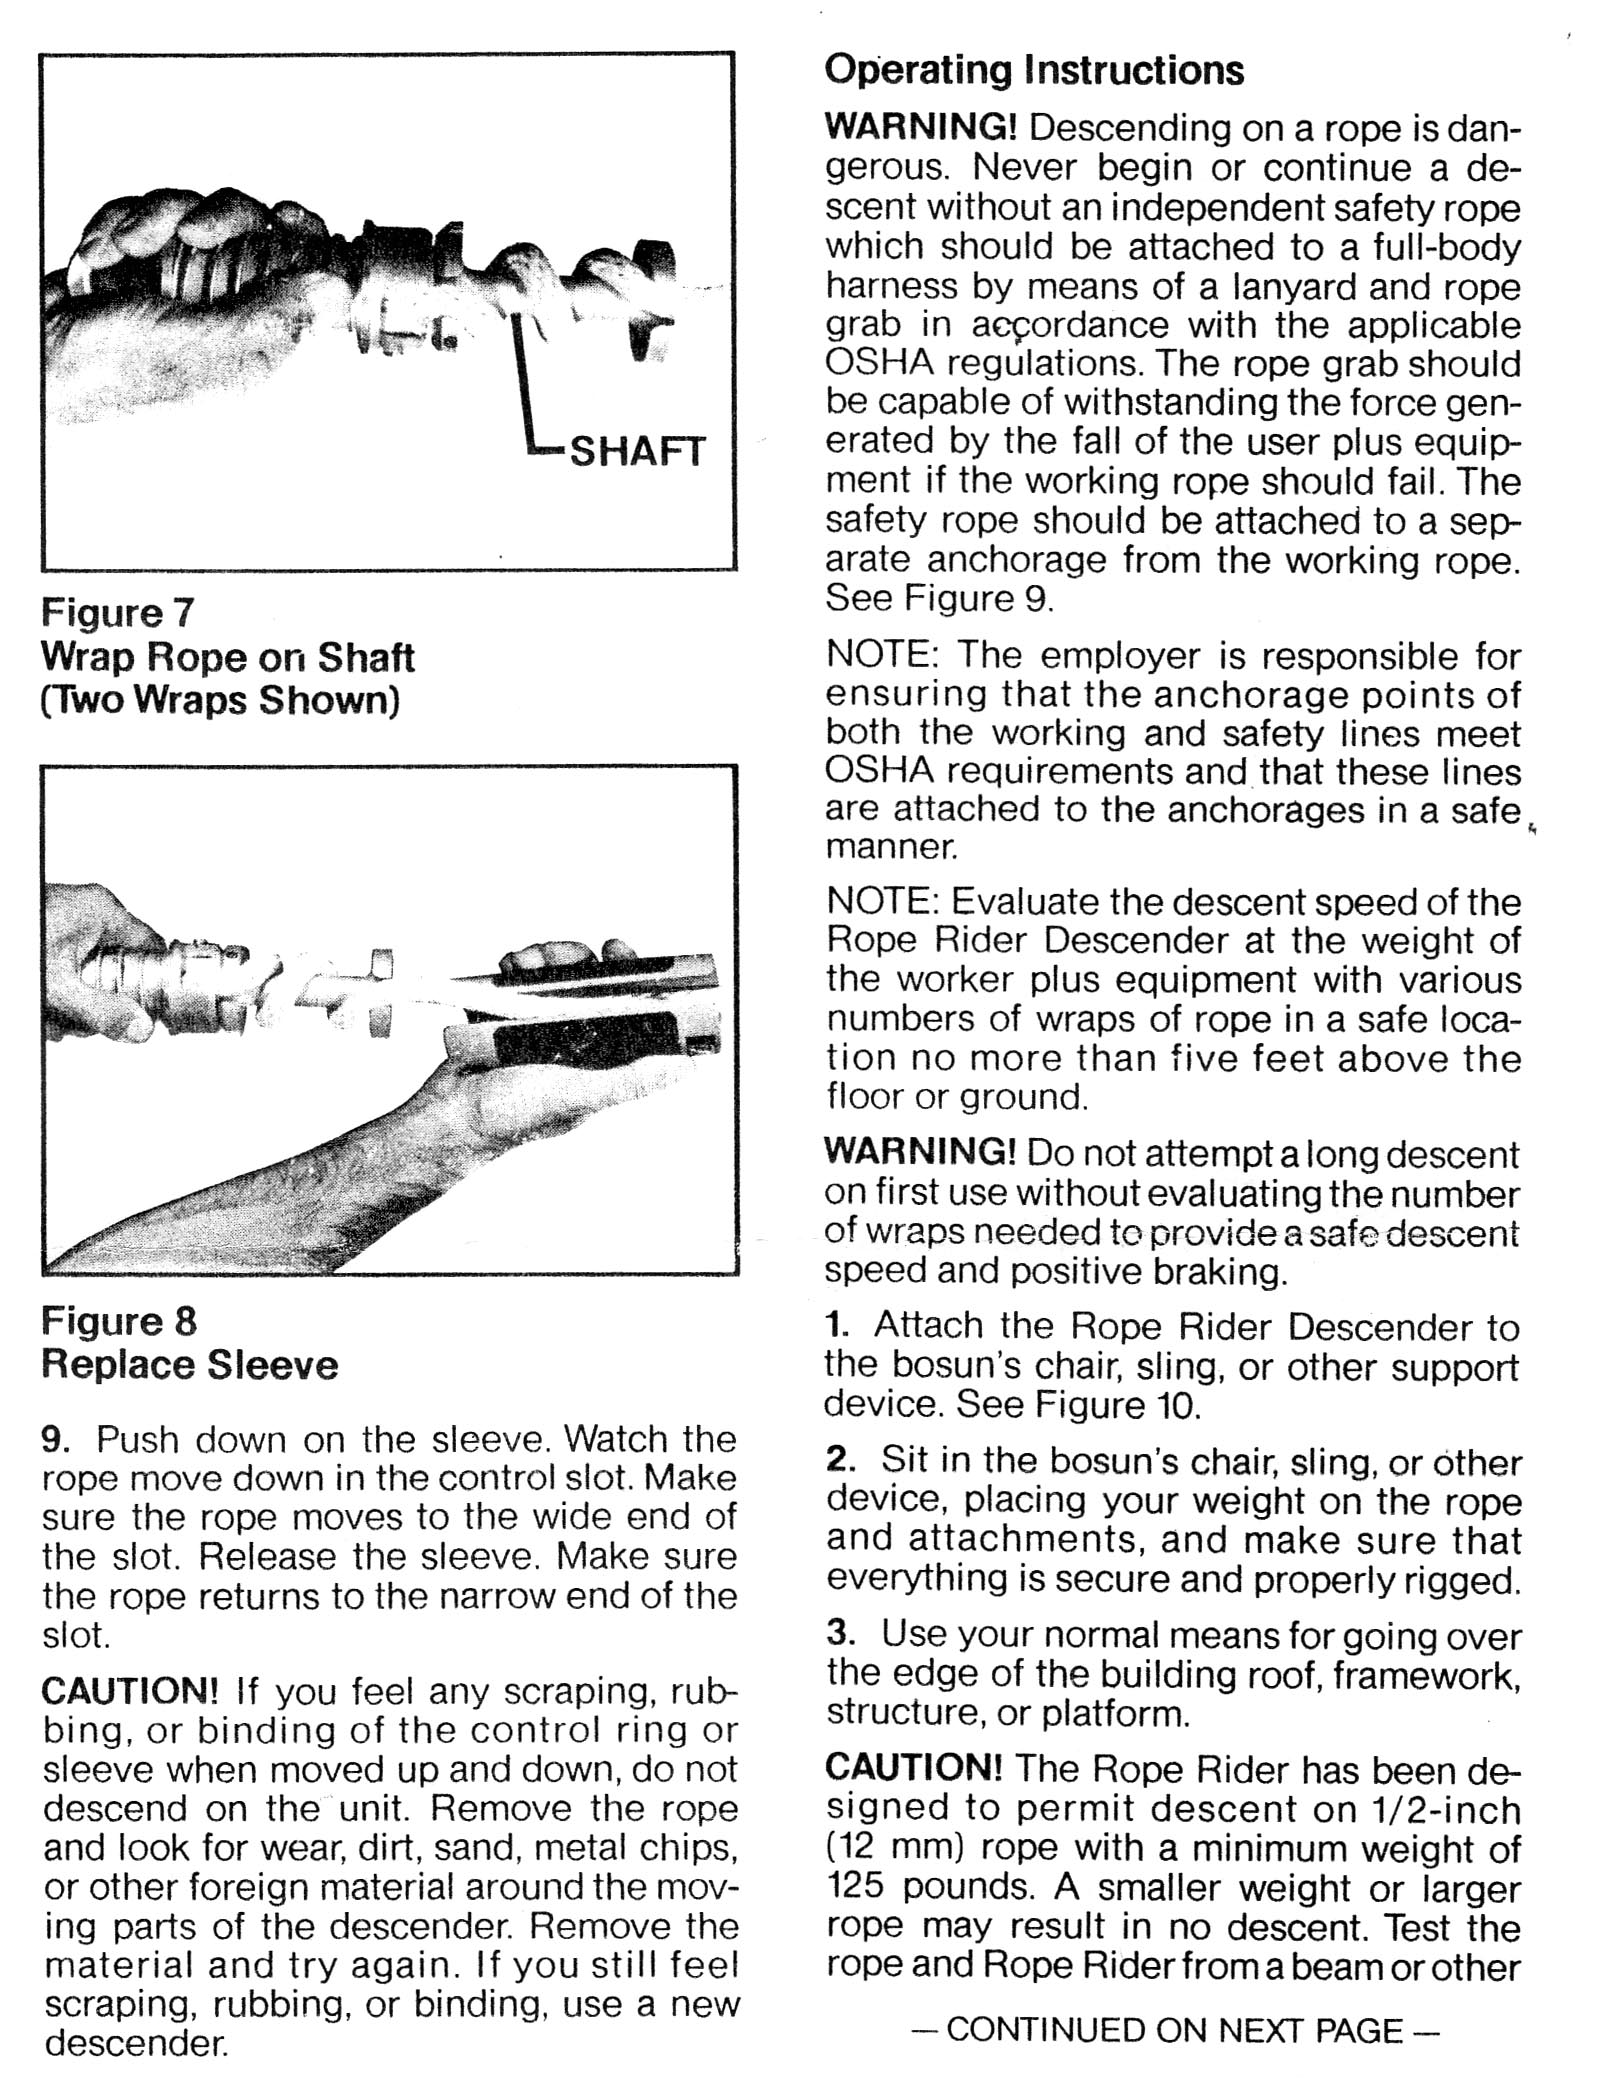
Rigging is
simple: Press the release button and slide the cover off the top.
Pull the sliding collar downward and press the button to latch
it in the open position. The V-slot is now exposed. Slide it over
the rope, then twist the collar and slide it back up, catching
the rope in the slot on the collar. Rotate the collar until it
is aligned as shown in the lower photo. Now wrap the rope the
required number of turns (usually 3 to 5, depending on the rope
material, diameter, construction, condition, and phase of the
moon) around the rod, slide the cover back on, and make sure that
the release button engages the hole in the cover.
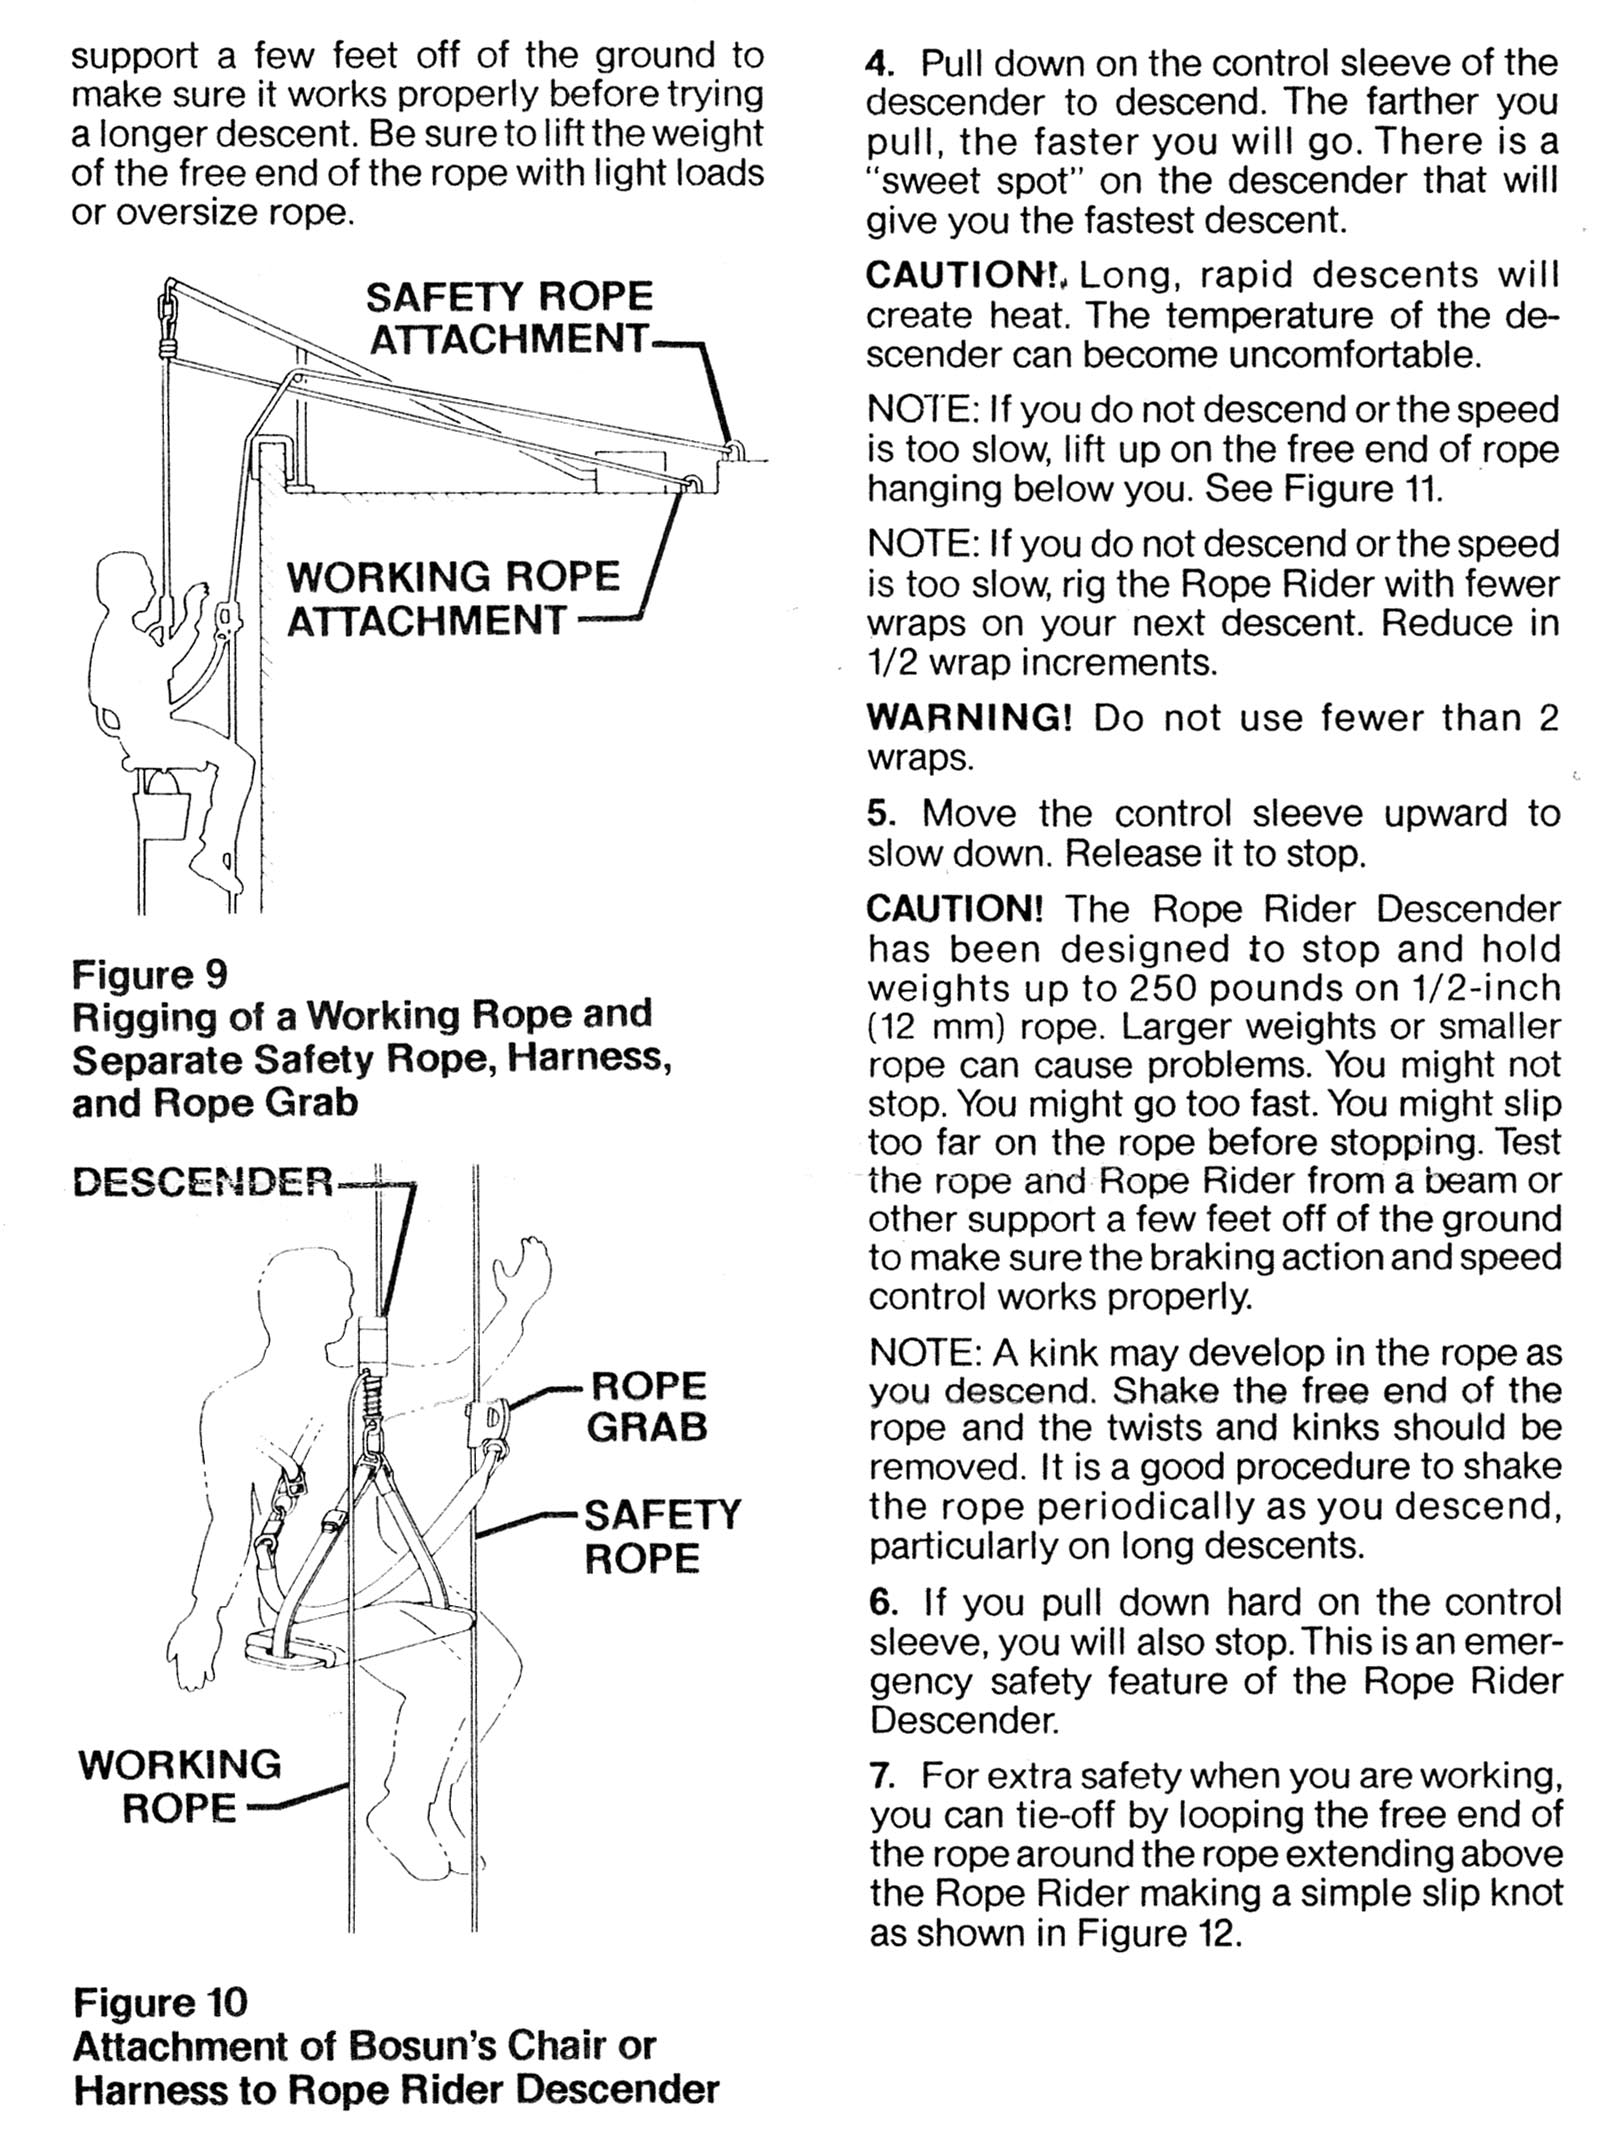
Clip in, and get into a normal rappelling position. Prudes
should stop here and find another device to read about. Grasp
the cover with one hand, and pull it down. This slides the collar
down, and moves the rope to a wider part of the V-groove. To slow
down, move your hand up, to go faster, pull it down. The whole
process works very smoothly…except it is still a vertical spool,
and on a free drop, you will spin.
|
 |
Warning:
These
are not complete instructions!! Obtain proper training before
using this device. |
|
|
This will not replace the rappel rack as the preferred deep
pit device, nor is it light enough for serious consideration in
rock climbing, but in an industrial environment, it may provide
some more idiot protection than some other options would.
[ Top
| Rope Rider I
| Rope Rider II
]